Recipes

Tuesday, October 8, 2013

Celery part 3

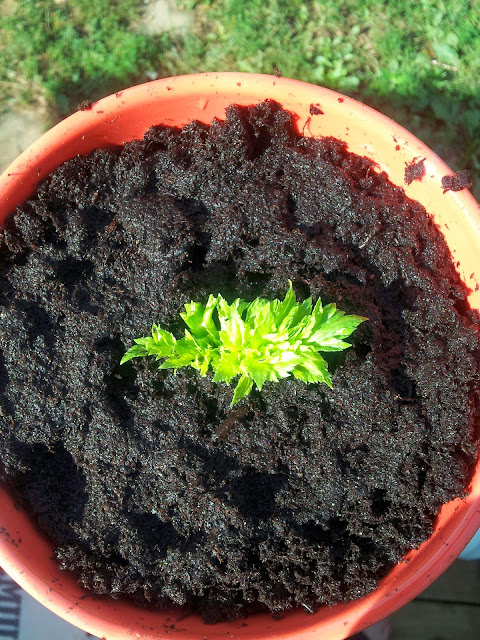
In just about a weeks time, the celery grew enough to put it in a pot!!! I recycled the soil from the coffee bean kits that never grew.

Right now I have it sitting in my window seal in some good sunshine. So I'll just keep it nice and watered, and post pictures as it grows!!!

Monday, October 7, 2013

Canned Apple Pie Filling

4 & 1/2 cup sugar
1 cup cornstarch
2 tsp sugar
1/4 tsp nutmeg
1 tsp salt
5&1/2 to 6 lbs tart apples
3 tbsp lemon juice

Mix first five ingredients, and stir in 10 cups of water. Cook until thick, and then add lemon juice. Pour over the apples that should be tightly packed in the jars.

Process in a water bath.
20 min for quarts
15 min for pints

As you can tell it's that time of the year!!! This is one of my favorite apple pie fillings. My favorite pay is knowing that I have home made pie filling in my pantry ready to pour into a nice fresh crust!!! Yummy!!!

Sunday, October 6, 2013

Celery pt 2

OK, so I've been talking about re growing celery for a few days now. And as you can imagine I've been checking on it a few times a day. Well yesterday I noticed that it was indeed drying out, which it's supposed to. When I got up in the wee hours of the morning, I noticed that I had the tiniest bit of new growth sticking up this morning. I didn't take a pic stupid me...because when I looked again a little but ago, it was sticking out even further!!! This time however...I took a couple of pictures to share with you of the progresd!!!

My Spanish rice recipe

1 lb rice
32 oz. Container beef broth
2 cups of water
Salt to taste
1 yellow bell pepper
1 green bell pepper
1 red bell peppet
2 red onions
5 lbs hamburger
2 - 29 oz cans tomato sauce
2 -2.25 oz cans black olives chopped
4-14.5 oz cans basil, garlic and oregano flavored diced tomatoes
3 -14.5 oz cans of regular diced tomatoes
Shredded mozzarella cheese
Shredded sharp cheddar cheese
Step 1. In a really big stock pot, add your rice, beef broth, water, and salt to taste. Cook on low with the lid off. Stir occasionally to make sure rice does not such or clump.
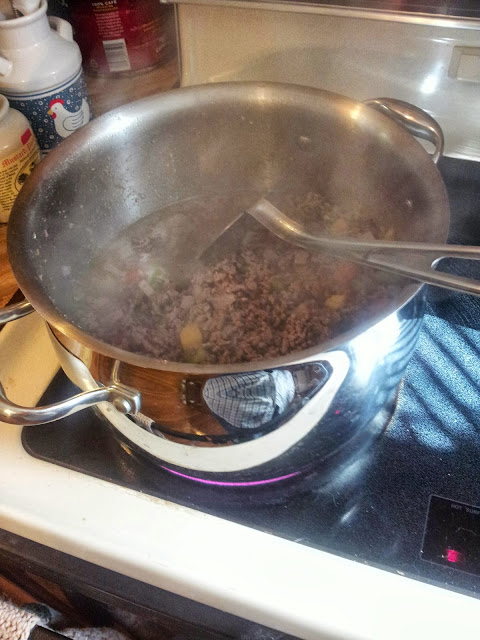
Step 2.  While rice is cooking, dice up all of your bell peppers, and onions. Cook your veggies and beef together in a pan our pot big enough to handle all of that.
Drain well. Let sit in strainer for about 5-10 min.
By this time your rice should be done cooking. While the meat us draining add the two cans of tomato sauce to the rice and mix well. Make sure you have your burner in medium heat.
Step 3. Stir the meat mix in with the rice, and mix well, making sure that nothing is sticking to the bottom.
Step 4. Start adding the rest of your ingredients excluding the cheese one can at a time, stirring well between each addition.
Once you've dine this, leave the lid off and allow to simmer for 15 to 20 minutes,  stirring occasionally to make sure nothing sticks.
After it's done simmering, remove from heat and allow to sit for another 5-10 minutes
-NOTE- the more time you take with this recipe, the better the flavors combine and come to life-I recommend starting it the day before you plan on serving it and allowing it to sit over night in the fridge. The longer it sits, the better it tastes.
Final step- get out your favorite casserole dish, and cover the bottom with your mixture. Fill it up about halfway. Then sprinkle with some of your cheese. After that fill it up to the top with your mixture. Cover it completely with cheese. Bake at 350 for 25-35 min. Cheese will be nice and bubbly and brown. Let it sit for about 5 min so you don't get burned.
-MORE NOTES- this recipe makes enough to feed a small army, but it freezes well-some people like to use the Mexican cheese mix, but I don't. The flavor is not that great for this recipe-and finally, do not use plastic anything while cooking this. Stir with a wooden our metal spoon. The plastic flavor will actually transfer itself to the casserole.

Friday, October 4, 2013

Celery

I decided to go ahead and try growing celery from the bottom of the stalk.  I just put it in one of my many bowls, put a little bit of water in the bowl, and now...we wait!!!  It seems I've learned a lot about waiting since I've started this little farm.

Speaking of waiting...the worst wait for me so far is over!!! The incubator has arrived! I was so excited when I saw the FedEx truck I scared my poor husband awake. I think I nearly gave him a heart attack. He says we should be able to put the eggs in their tonight. Yes...I know, technically I'm supposed to let it sit overnight...but I'm at least letting it sit 8 hours.

Wednesday, October 2, 2013

Day on the Farm

So today was a busy day here on my little farm.  Other than doing the domestic goddess work, I also finished harvesting the worm tub I started harvesting yesterday. I put a bunch of fallen leaves in there with them. Worms like that kind of stuff!  This tub was going to get divided in half, but I realized as I was prepping it, that we got a tub that is twice the size of the tubs we had been getting. I'm not sure how we did that, other than we weren't paying attention to what we were getting because it was the same color as the other tubs we normally get. So, I didn't divide it up, I'll still have 2 extra tubs, I'll just divide up 2 other tubs. In all honesty I think there is only one other tub that really needs to be divided up, the other two tubs were made a couple of months ago, they were split from our original tub.

Then of course I've spent the day checking on my flock of chickens a little extra today. I'm gathering eggs for the incubator. Its due to be here tomorrow or Friday. I'm looking so forward to that!!! (well obviously I am because I'm already saving eggs!!!) I think its going to be hard when we get to the part where we butcher what was once a cute adorable little chick....one that we raised from an egg, but when I think about all of the nourishment its going to provide us over the winter time next winter...(yeah, I know we are planning our pantry for a year from now...crazy) Its kind of hard to figure I guess.

I've also been plotting and planning for the spring gardening as well. Its never too early to start thinking about that. I'm researching different strains of vegetables that will grow better in our soil. We are working pretty hard to try and get our garden soil better. The first step we took was by starting a compost pile when we got the chickens. From there I have a bucket underneath of my sink that I dump out there a couple of times a week. We are going to have to turn the pile here soon though, I'm not sure how hard or easy its going to be. Everything on the bottom of the pile is old bedding from out of the chicken coop, and its filled with chicken poop...then there is the layers of kitchen waste, egg shells, coffee grounds and scrapings from our dinner plates, and then there is some grass clippings where my husband tries to rake as much onto it as possible, when he mows the lawn, and some more bedding, chicken poo where I go ahead and scrape some of the poop out of the coops, and off of the coops into a bucket and dump on there...well you get the idea. What's on the bottoms has been there for several months now, and I'm assuming its going to be good to get it turned. I'm not really sure how often your supposed to turn a compost pile though, I may have to do a bit of research that.

I've found some really interesting links for some different things that I find helpful and just neat that I plan on trying. I'll be putting some links up in a blog post sometime in the near future for your viewing enjoyment.

Well folks, I think its time for this little Farm woman to retire for the night.
Sleep tight!!! And happy farming!!!

Worms

I've been working on harvesting my worm tubs. I was doing the one by hand so that I could get an idea as to how many cocoons I would find. I need to finish that tub, but I'll finish it up this evening. The other 4 I'll use the harvester my hubby made for me.